ubuntuでのtimemachine

ubuntu22.04でMac用のTimeMachineサーバを立ち上げるための設定メモ

ネットを調べるといろいろな設定があったのですが,最終的には
こちらが参考になりました。

ubuntuというユーザを作成し,このユーザの権限で書き込むことにします

/etc/samba/smb.confを修正
globalに以下を追加

[global]
  fruit:encoding = native
  fruit:metadata = netatalk
  idmap config * : backend = tdb
  vfs objects = catia fruit streams_xattr

smb.confの最後にこれを追加

[timemachine]
  path = /path/to/timemachine
  guest ok = yes
  read only = No
  force user = ubuntu
  fruit:time machine max size = 500G
  fruit:time machine = yes

ubuntuでのsysstat

悩んでしまったのでメモ

ubuntuでsysstatを入れるには,

sudo apt install sysstat

でインストールし,

sudo vi /etc/default/sysstat


ENABLED=”true”
にするというもの。
その後

sudo /etc/init.d/sysstat restart

で再起動でOK
というはずだった。。

しかしこれだけではうまくいきません。

$ sar
Cannot open /var/log/sysstat/sa24: No such file or directory
Please check if data collecting is enabled

こんな感じでエラーが出るだけ。。。

ようやく解決しました
上記設定を行った後,これを実行し再起動するだけ

sudo systemctl enable sysstat

ずいぶん悩んでしまいました。。。

Raspberry PI4 でNextCloudを構築

概要

Dropbox,OneDrive,GoogleDrive,Boxなど色々アカウントを作って
便利に使っているのですが,無料アカウントだと容量が少ないのがネックとなります。
4つ持っていてもすぐに一杯になり,iPhone,iPadと連携して使う分にはすぐに
いっぱいになります。

そこで,オープンソースのNextCloudをRaspberryPIに入れて自宅でディスクストレージ
を構築することにします。

RaspberryPIの準備

RaspberryPI

先日たまたま秋葉原で見つけて購入したRaspberryPI4の4Gメモリ版を流用します。
Windows10を入れて使っていたのですが,如何せん重いのと,リモートで使うのには
不便なので,ここで一旦Linux化することにします。

raspbian os

Macを使っているのですが,公式サイトから,Raspberry Pi Imagerをダウンロードし
インストールします。SDカードを挿して,Raspberry Pi Imagerを起動,CHOOSE OSメニューの
otherからRaspberry Pi OS Liteを選択しインストールします。
ちなみにSDカードは32Gのものを使いましたが,OS入れただけだと2G程度の使用量です。

update

おきまりのアップデートをします

sudo apt udpate -y
sudo apt upgrade -y

リモート設定

sshログインできるように設定します

sudo raspi-config

3 Interface OptionsからP2 SSHを選択し YESを選択

ifconfig

このコマンドでIPアドレスを調べてリモートからログインできるようになりました

固定IPアドレス

固定にしないと面倒なので固定IPにします

sudo vi /etc/dhcpcd.conf
interface eth0
static ip_address=192.168.10.102/24
static routers=192.168.10.1
static domain_name_servers=192.168.10.1 8.8.8.8

こんな感じで追加しreboot

NextCloud

インストール

こちらを参考にインストールします。
インストールにはsnapというパッケージ管理システムを利用します。このコマンド一発で,MySQLなど必要なものが全てインストールから設定まで行ってくれます。

sudo apt install snapd
sudo snap install nextcloud

ルータの設定

外部からアクセスする関係上,ルータに穴を開けます。
80と443をこのRaspberryPIのIPアドレスにマッピングします

ダイナミックDNS

固定IPアドレスならば気にする必要ないのですが,プロバイダによってはダイナミックIPアドレスの場合があるので,SofteatherVPNをインストールした時に,設定したダイナミックDNSのホスト名を使用します。
vpn0000000000.softether.netといった感じのやつですね。

ユーザ追加

管理者を追加します。sudoでやるとパスエラーが出たので,Rootになってから実行しました

sudo su -
nextcloud.manual-install sammy password

エラーがいっぱい出ましたが,無事終了

ERROR: ld.so: object '/usr/lib/arm-linux-gnueabihf/libarmmem-${PLATFORM}.so' from /etc/ld.so.preload cannot be preloaded (cannot open shared object file): ignored.
Nextcloud was successfully installed

Trusted Domains

sudo su -
nextcloud.occ config:system:get trusted_domains

先ほど設定したドメイン名も

nextcloud.occ config:system:set trusted_domains 1 --value=vpn00000000.softether.net
ERROR: ld.so: object '/usr/lib/arm-linux-gnueabihf/libarmmem-${PLATFORM}.so' from /etc/ld.so.preload cannot be preloaded (cannot open shared object file): ignored.
System config value trusted_domains => 1 set to string vpn00000000.softether.net

仕上げ

SSLの設定

外部からアクセスするのでLet’s Encryptの無料SSLを入れます。

sudo su -
nextcloud.enable-https lets-encrypt
In order for Let's Encrypt to verify that you actually own the
domain(s) for which you're requesting a certificate, there are a
number of requirements of which you need to be aware:

1. In order to register with the Let's Encrypt ACME server, you must
   agree to the currently-in-effect Subscriber Agreement located
   here:

       https://letsencrypt.org/repository/

   By continuing to use this tool you agree to these terms. Please
   cancel now if otherwise.

2. You must have the domain name(s) for which you want certificates
   pointing at the external IP address of this machine.

3. Both ports 80 and 443 on the external IP address of this machine
   must point to this machine (e.g. port forwarding might need to be
   setup on your router).

Have you met these requirements? (y/n) y

yを入力します

Please enter an email address (for urgent notices or key recovery): 

メールアドレスを入力しEnter

Please enter your domain name(s) (space-separated): 

先ほど設定したダイナミックDNSのホスト名を入力

これでとりあえずはインストール完了です。

その他

そのほかとして

  • Apacheの設定をhttpからhttpsへのリダイレクト
  • linuxのApplicationFireWall設定など

いろいろセキュリティ絡みが残っているのですが,それはまた別の話。。。

ジョブスケジューラのエラー

大学のスパコンはジョブ管理システム PBSによってジョブスケジュールを行なっているのですが,
最近変わったのか,Pythonで並列処理をしようとするとなぜかエラーが出るようになりました。

エラー

=>> PBS: job killed: ncpus 20.8 exceeded limit 16

コード


import os
from mpi4py import MPI
comm = MPI.COMM_WORLD
size = comm.Get_size()
rank = comm.Get_rank()
name = MPI.Get_processor_name()

import csv
source=[]
target=[]
with open("test.csv","r",encoding="utf-8") as f:
    cdata=csv.reader(f,delimiter=",")
    for i,items in enumerate(cdata):
        if i==0:
            continue
        source.append(items[0])
        target.append(items[1])

data_lst=[]
for src,tgt in zip(source,target):
    data_lst.append((src,tgt))

# http://muscle199x.blog.fc2.com/blog-entry-70.html?sp
def split_list(lst, n):
    list_size = len(lst)
    a = list_size // n
    b = list_size % n
    return [lst[i * a + (i if i < b else b):(i + 1) * a + (i + 1 if i < b else b)] for i in range(n)]

from transformers import MT5ForConditionalGeneration, MT5Model, MT5EncoderModel, T5Tokenizer

tokenizer = T5Tokenizer.from_pretrained("google/mt5-base")
model = MT5ForConditionalGeneration.from_pretrained("google/mt5-base")
if rank == 0:
    data = split_list(data_lst, size)
else:
    data = None

def calc(my_data):
    res=[]

    for src,tgt in my_data:
        inputs = tokenizer.encode("summarize: " + src, return_tensors='pt', max_length=512, truncation=True)
        summary_ids = model.generate(inputs, max_length=50, min_length=10, length_penalty=5., num_beams=2)
        summary = tokenizer.decode(summary_ids[0])
        res.append((src,tgt,summary))
    return res

my_data = comm.scatter(data, root=0)

for r in range(comm.size):
    if rank == r:
        print("scatter.[%d] %d" % (rank, len(my_data)))
    comm.Barrier()

my_res = calc(my_data)
def flatten(l):
    try:
        return ([item for sublist in l for item in sublist])
    except:
        import traceback
        traceback.print_exc()
        print(l)

# gather
res = MPI.COMM_WORLD.gather(my_res, root=0)

if rank == 0:
    res=flatten(res)
    for src,tgt,summary in res:
        print(f"source:{src}")
        print(f"target:{tgt}")
        print(f"summary:{summary}")
        print("-----")

これで実行スクリプトはこんな感じ

#!/usr/bin/bash
#PBS -N sample
#PBS -j oe 
#PBS -l select=1:ncpus=64:mpiprocs=64
#PBS -q SINGLE
NPROCS=`cat $PBS_NODEFILE|wc -l`
cd ${PBS_O_WORKDIR}
mpirun -np ${NPROCS} python mt5.py

解決方法

ここにありました。

簡単に解決するためには,Pythonコードの一番上に


import os
os.environ["MKL_NUM_THREADS"] = "1"
os.environ["NUMEXPR_NUM_THREADS"] = "1"
os.environ["OMP_NUM_THREADS"] = "1"

これを入れるだけ。Numpyを呼ぶ前に呼ぶ必要があるので,シェルスクリプトで呼んでもいいですし,Pythonの一番上で環境変数に設定してやってもいいです。

LinkstationにDebianを導入し,Timemachineサーバにする

LS-V1.5TLというBuffaloのNASをずいぶん前に買ったのですが,あまり活用ができていなかったので,
Linuxを入れることにしました。

元々のNASのファームウエアにもTimemachineサーバはついているのですが,もう古いマシンなので壊れても
いいという感じでLinux化し遊ぶことに。

Linux化

こちらの記事がわかりやすいです。
一度分解し,HDDを取りだすのが面倒ですが,それさえ終われば,快適なLinux化ができます。
当然のように,分解の際にほぼ全てのつめを折ってしまいましたが気にしない。

timemachine

手順などはあちらこちらに書いているのですが

avahi

ここを参考に,avahiをインストールします。debianのパッケージがあるのでそのまま使います

sudo apt install avahi-daemon

設定はこんな感じ

/etc/avahi/services/timemachine.service


 %h
 
   _smb._tcp
   445
 
 
   _adisk._tcp
   dk0=adVN=TimeMachine,adVF=0x82
 

samba

sambaをインストールします。Samba上で使うみたいです

sudo apt install samba

sambauser

timemachineとユーザを作ります

sudo adduser timemachine
sudo password -a timemachine
sudo smbpasswd timemachine

timemachine directory

バックアップ用ディレクトリを作成します

sudo mkdir /mnt/timemachine
sudo chown -R timemachine:timemachine /mnt/timemachine

smb.conf

ここでポイントは,通常のSambaユーザとは別にし,Finderなどからはいじれないようにします。
同時にアクセスするとエラーになるための回避です。

[TimeMachine]
   path = /mnt/timemachine
   browsable = yes
   writeable = yes
   create mode = 0664     #tried turning this off, no fix
   directory mode = 0777  #tried turning this off, no fix
   vfs objects = catia fruit streams_xattr
   fruit:aapl = yes
   fruit:time machine = yes
   #guest ok = yes
   fruit:time machine max size =1T  #tried turning this off, no fix
   inherit acls = yes

restart

リスタートします

sudo /etc/init.d/smbd restart
sudo /etc/init.d/avahi-daemon restart

これで使えると思います。

beep音削除

microsoft terminalからubuntuへsshログインしたとき、BEEP音がうるさいのを削除する設定

csh

~/.cshrcに以下を追加

set nobeep

bash

~/.inputrcに以下を追加

set bell-style none

vim

~/.vimrcに以下を追加

set vb t_vb=

リモートサーバのtensorflowの結果を表示する

大学のサーバなどで計算した後の結果を確認する時に、
わざわざ計算結果のデータをローカルに持ってくるのは面倒だったりします。
リモートの結果を表示できないかと言うことで、SSHポートフォワードを使って
ローカルでも表示できるようにします。

tensorflowダウンロード

$ git clone https://github.com/tensorflow/tensorflow
$ cd tensorflow

使用しているtensorflowは1.15なのでバージョンを合わせます

$ git branch -a
$ git checkout -b r1.15 origin/r1.15

これで1.15のブランチになります。以下のコマンドで確認。

$ git branch
  master
* r1.15

mnist

mnistを計算してみます

$ cd /tensorflow/examples/tutorials/mnist
$ mkdir logs
$ python fully_connected_feed.py --log_dir=logs

logs以下にファイルが作成されていることを確認します

$ ls logs
checkpoint                               model.ckpt-1999.meta
events.out.tfevents.1573779801.vpcc-101  model.ckpt-999.data-00000-of-00001
model.ckpt-1999.data-00000-of-00001      model.ckpt-999.index
model.ckpt-1999.index                    model.ckpt-999.meta

ポートフォワード

サーバが外部公開されていないなど、ローカルPCから直接ブラウザでアクセスできないときのために、SSH
ポートフォワードを使用します。
こちらを参考に、
macから繋ぐためにはターミナルから以下のコマンドを打ち込みます。

$ ssh -L 8081:remotehost:10010 remotehost -lusername

これは、リモートサーバの10010ポートをローカルの8081ポートで見れるようにするためのものだと思えばいいです。

まずは、動くかどうか確認です。
リモートでpython簡易サーバを立ち上げます

$ python -m http.server 10010

ブラウザでhttp://localhost:8081にアクセスし確認します。
ディレクトリリストが見えることがわかります。
Ctrl+Cでシャットダウンします

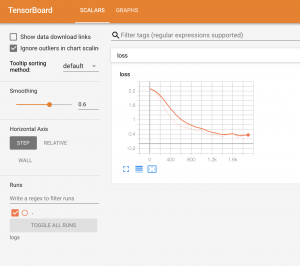
tensorboardによる可視化

先ほど計算した、mnistの計算結果を表示してみます。

$ tensorboard --logdir=logs --port 10010
TensorBoard 1.15.0 at http://remotehost:10010/ (Press CTRL+C to quit)

ブラウザでhttp://localhost:8081にアクセスします

表示されました。

ワンライナーで拡張子を変更

Bashの変数から拡張子を除いたファイル名を取得するには

a="file.txt"
echo ${a%%.txt}  # aと表示

これをうまく利用すると一気にディレクトリ内のファイルの拡張子を変更できます。txtをjsonに変更する例はこれ。

for f in *.txt;do mv $f ${f%%.*}.json; done

リモートでJupyter Notebookをつかう

大学のサーバでどうしてもJupyter Notebookが動かしたいのでメモ。

経緯

データをSQLiteで管理しており,これのサイズが10Gを超え始めた。計算などは大学のサーバで行なっているのであるが,RやJupyterなどビジュアルなツールを使いたい時にはいちいちローカルのPCへSQLiteをコピーするのが大変。

以前Xサーバを使ったリモートでの起動を試したが,どうも使いづらい。
Macからだと,XQuartzをあらかじめMacにインストールしておき,
以下のSSHコマンドで接続し,

[mac] $ ssh -Y remotehost

Jupyterを起動するだけ。

[server] $ jupyter notebook

これで,リモートサーバでFirefoxが立ち上がり,MacのXQuartzで表示される。
しかしこれがいかんせん使いづらい。遅いし,サーバ側のFirefoxなので見た目も悪く,日本語入力も一苦労。

設定

Jupyter

まずはここを参考に設定する。

$ jupyter notebook --generate-config

~/.jupyter/jupyter_notebook_config.pyを編集。ポートが8080が空いている場合には以下のように指定する。

c.NotebookApp.ip = '0.0.0.0'
c.NotebookApp.open_browser = False
c.NotebookApp.port = 8080

R

Rも使いたいので,ここを参考にRを起動してインストール。

install.packages(c('repr', 'IRdisplay', 'crayon', 'pbdZMQ', 'devtools'))

devtools::install_github('IRkernel/IRkernel')
IRkernel::installspec()  

起動

$ jupyter notebook

[I 17:43:07.065 NotebookApp] Serving notebooks from local directory: /tmp
[I 17:43:07.066 NotebookApp] 0 active kernels
[I 17:43:07.066 NotebookApp] The Jupyter Notebook is running at:
[I 17:43:07.066 NotebookApp] http://0.0.0.0:8080/?token=37e418b82da8472bf89798f70a92dda90003f61509xxxxx

起動時に現れるこれから,

http://0.0.0.0:8080/?token=37e418b82da8472bf89798f70a92dda90003f61509xxxxx

以下のようにPCのブラウザのアドレスバーに打ち込めばOK

http://server:8080/?token=37e418b82da8472bf89798f70a92dda90003f61509xxxxx

githubの仕様変更に対応する

昨日までちゃんとアクセスてきていたのですが,今日,git pushしようとするとエラーが発生。

fatal: unable to access 'http://github.com/xxxxx/yyyy.git/': error:1407742E:SSL routines:SSL23_GET_SERVER_HELLO:tlsv1 alert protocol version

ここに書いていました。SSLプロトコルはどうやら仕様から外れた模様。TLSにあげてくださいとのことです。

使っている大学のサーバのアプリケーションは古いモジュールが多く,OPENSSLもいまだに0.9.8のもの。相当古いです。。。

そこでインストールし直しますが,大学のサーバなので,ユーザ領域にインストールする必要があります。

環境

サーバcray スパコン
ユーザ領域/work/$USER

OpenSSL

wget https://www.openssl.org/source/openssl-1.0.2n.tar.gz
tar zxvfp openssl-1.0.2n.tar.gz
cd openssl-1.0.2n
./config -fPIC --prefix=/work/$USER/local shared
make
make install

ここを参考に,32bitモードでコンパイルします,これはいらないかも?

setarch i386 ./config -m32 -fPIC --prefix=/work/$USER/local shared
make clean
make
make install

curl

wget https://curl.haxx.se/download/curl-7.47.1.tar.gz
tar zxvfp curl-7.47.1.tar.gz
cd curl-7.47.1
PKG_CONFIG_PATH=/work/$USER/local/lib/pkgconfig ./configure --prefix=/work/$USER/local --enable-libcurl-option --with-ssl=/work/$USER/local  --with-includes=/work/$USER/local/include/openssl
make
make install

git

wget https://github.com/git/git/archive/v2.16.2.tar.gz
tar zxvfp v2.16.2.tar.gz
cd git-2.16.2
./configure CFLAGS='-I/work/$USER/local/include' LDFLAGS='-L/work/$USER/local/lib64' --prefix=/work/$USER/local --with-openssl=/work/$USER/local --without-tcltk
make 
make install